
Time spent here saves considerably more time later. The two mistakes that cost the most are importing a file that was never going to produce reliable quantities, and importing two models that overlap.
None of this is mandatory. If you're working on a small model, or you'd rather sort things out after the import, skip to Link and send your Revit model — everything here can also be handled in eTool or in Excel later.
Check you have the right file
Use a native Revit file. If what you've been given is an IFC, you can open and convert it in Revit, and the plugin will appear to work — but Revit doesn't measure elements from a converted IFC the way it measures native geometry, so the quantities that reach eTool aren't reliable. Ask for the native Revit file, or use the CSV route instead.
The same caution applies to individual pieces of geometry brought into a Revit model from another modelling tool, whether placed directly or wrapped inside a custom family. These often carry no usable material information, so they're worth identifying early and handling separately.
Work out which models you need
Ask whoever is sending you files what the scope of each one is. On most projects you'll get an architectural model, and on larger projects a structural model as well.
Start with the architectural model. It's generally the more comprehensive of the two — it already contains most structural elements.
Then ask whether you also need the structural model. The usual reason you do is foundations: on larger projects the structural foundations are typically modelled in the structural file, not the architectural one. (This is mostly a working-practice thing — different team members work in different files.) Foundations are rarely something you can leave out of an LCA, so if they're not in the architectural model, you need the structural one too.
You may also encounter a separate fit-out model. Same logic applies: decide whether its scope is already covered elsewhere.
Avoid double-counting
If you import both an architectural and a structural model into the same design, anything modelled in both will be counted twice. Two models that each contain the slab give you two slabs, and eTool has no way to know they're the same slab.
You can sort it out in eTool after importing, or in Revit before. Neither is automatically easier — it depends on the model and on where you work faster.
- In eTool. Import both models, then ignore the duplicate rows as you match. No Revit work needed, but on a large model you're hunting for overlaps in a long list.
- In Revit. Delete the overlapping elements before importing, preferably from the structural model since the architectural one is usually more complete. More up-front work, but the bigger the model, the more it saves later.
How to decide: open the 3D view and look. If you can see at a glance which elements belong to which model, and it's a quick set of deletions, do it in Revit. If you can't tell them apart with any confidence, don't — you'll do more harm than good. Import both and work through the list in eTool instead.
If you edit in Revit, save a copy first and edit the copy. Never delete elements from a file someone else owns and may still be working in.
You can also use this technique to split a building deliberately. If you need separate assessments of, say, an office block and its attached car park as well as a combined one, separating them in Revit gives you clean, independent inputs.
Know what your model won't contain
Some materials are routinely absent from a Revit model, either because they're too detailed for the current design stage or because they're easier to draw in 2D. The usual ones:
- External works
- Reinforcement
- Wall and floor finishes
- Railings
- Non-distinct wall components e.g., studs, insulation, cladding.
- Steel framing for façade systems and ceilings
Most of these are supplied by the eTool template you match to, so their absence from the model isn't a problem in itself. What matters is knowing which ones aren't covered that way, so they can be added separately.
If your own team built the model, you probably already know what was left out. If it came from someone else, spend a few minutes reviewing for these before the take-off rather than discovering the gap in your results.
Use functions to keep imports separate
eTool asks you to choose a function when you import. Where you're importing more than one model into the same design, giving each import its own function — structural elements under one, fit-out under another — keeps them distinguishable once they're in.
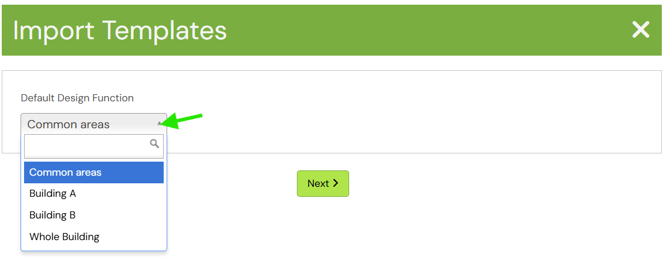 If your design has several functions, set them up in eTool before you import. You'll also see functions referred to as Asset IDs in the CSV import articles — same concept, and that's the column name a spreadsheet import uses to assign each row to its function. See Functions: bulk import and reporting.
Names matter more than you'd expect
eTool matches on the component identity coming out of Revit: the Family and Family Type. Those names are user-defined, not standardised, so they vary between projects and between modellers.
Basic Wall: 190 Blockwork Rendered will match sensibly. Basic Wall: Wall 3 will not.
eTool's matching also remembers the choices you've made before, so good naming keeps helping you — on every future project , not just this one.
If you can influence how models are built, ask for consistent, descriptive family and family-type naming. This is the single highest-value request you can make of a BIM team, and it costs them almost nothing if it's agreed up front.
The version of this worth aiming at: one eTool template for each Revit family you use regularly. Get there and mapping becomes close to instant every time you load a model, because every family already has a template waiting for it. Teams that work from a standard Revit template across their projects are best placed to do this — the library is built once and pays back on every project after.
The level of detail in the model matters less than you'd expect. It's common to open a model and find placeholder or generic materials through an entire wall build-up — sometimes nothing more than a white paint material standing in for the lot. That doesn't stop you. eTool reads the element, and the template supplies what the model never contained.
If you can't, you have two options. Bulk renaming in Revit can be done with Dynamo if the model is yours to change. If the model is tied to other systems and the names can't move, eTool templates have a unique-identifier field that lets you match on a stable code instead.