
Linking is a persistent connection, not a one-off export. Once a Revit model is linked to an eTool design you can push changes across repeatedly and eTool updates the existing design rather than creating a new one. That behaviour is the main reason to use the plugin over a CSV export.
The three buttons (after Log out) on the eTool tab run left to right in the order you use them: Link Design → Update eTool → Launch eTool.

Before you start
Your project and design must already exist in eTool. The plugin links to a design; it can't create one. If you open the link dialog and can't find your project, this is nearly always the reason.
1. Link the design
Click Link Design. A dialog opens showing your projects, then the designs within them — the same project-and-design structure you see in eTool itself. Select the project, then select the design, then click Link.
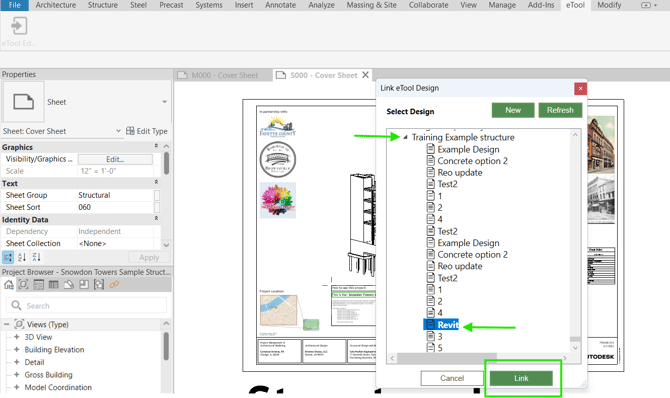
Link records the connection — it doesn't move any data yet. The sign that it worked is Update eTool appearing on the ribbon. That's both your confirmation and your next step.
Two things worth knowing about this dialog:
-
The list is ordered, even though it doesn't look it. Projects are grouped by organisation, the newest organisation first, with your personal projects at the bottom. Within each organisation, newest project first. There are no headings to make this visible, so it reads as a long flat list — but if you know roughly when a project was created, you know roughly where to look.
-
You'll see what you have access to, not everything. A project appears if you own it personally, or if you're active in the organisation that holds it and have some role on it — organisation administrator, or lead or collaborator on one of its structures. Within a project, you'll see the structures and designs you're allowed to edit, since adding an import means editing. It's the same access model as the rest of eTool projects.
If something you expected isn't there, open that project in eTool. An orange message at the top of the page explains the access you have and why.
2. Update — send the components across
Click Update eTool. This is the step that actually moves data, and it's where you get feedback.
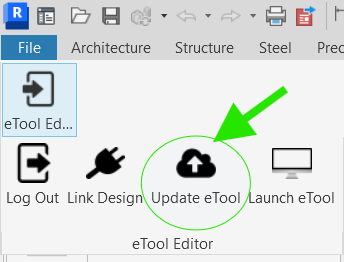
A progress window appears and works through two stages:
- Step 1: Analysing Revit model
- Step 2: Sending components to eTool
For most models this is close to instantaneous. A large model might take 10–30 seconds.
When it finishes, a confirmation window appears — "Your eTool model was successfully updated" — with a count of the elements sent. Click OK and you return to Revit.
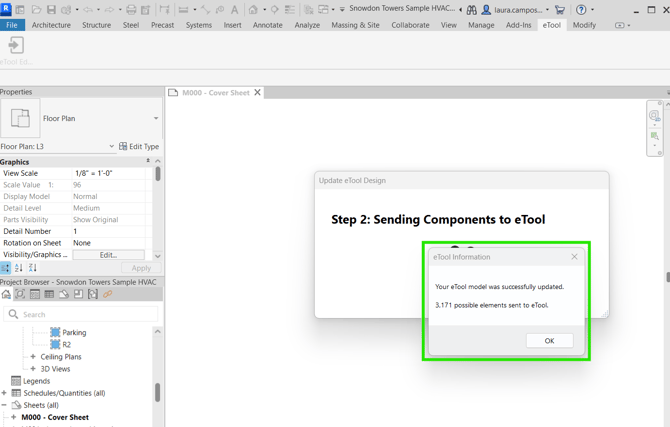
If it seems to hang, check your other windows. The confirmation window doesn't always come to the front, particularly if you're running two monitors. It's very often sitting behind Revit or on your other screen, waiting for you to click OK. This is the single most common reason people think the update has frozen.
3. Launch — open eTool
Click Launch eTool to open eTool in your browser.
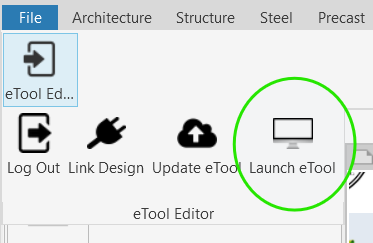
The first time you click Launch, your browser will open directly to that design’s imports page.To avoid cluttering your browser with a new tab every time you sync changes from Revit, subsequent updates to the same design won't auto-open a new page. For follow-up syncs, simply switch over to your open eTool browser tab and refresh the page to see your updated import.
4. Find your import in eTool
In eTool, open your project and design, then go to the Import tab. Your Revit file appears there by filename, with the date it was last updated and a delete option.
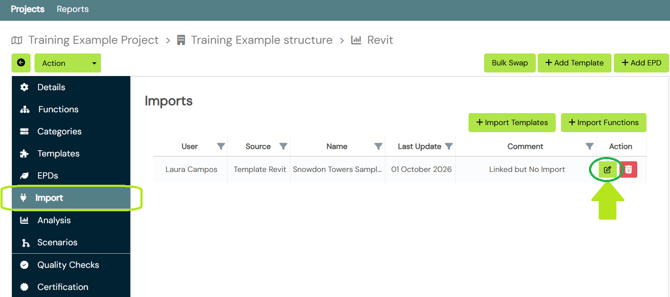
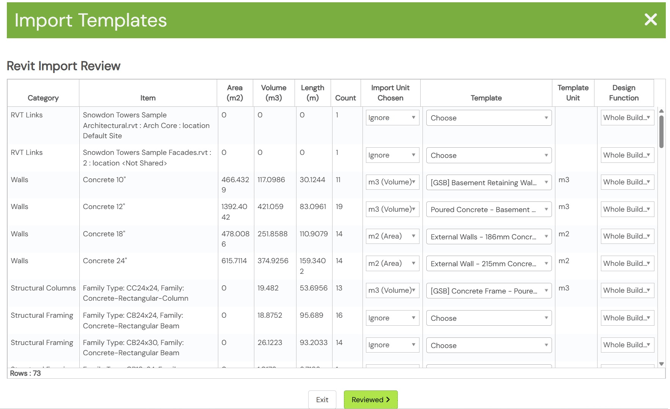
There's one more step before the components reach your design. The import sits in this tab as a staged list until you open it, match each component to a template, and confirm — which gives you a chance to review what came across before it lands in the assessment.
Select the import line and click Edit to begin. See Match imported components to eTool templates.
Pushing an updated model, or a different design option
This is where the persistent link saves you the most time. Make your changes in Revit, then click Update eTool again. eTool recognises the design you're linked to and applies the changes:
- Removed components are removed automatically
- Quantity changes are applied automatically
- Only genuinely new components need matching
For design options, this means you can run your first option, match it once, eTool remembers what you matched. Import the same Revit item again, into this design or a new one, and it matches itself. You only deal with items eTool hasn't seen before.
That memory lives in the designs themselves. Delete a design and its matches go with it.
Two ways to handle a set of options:
- Same design each time. It shows your current option; the previous one is replaced. Use it when you're working towards one design.
- A design per option. Push each option to its own design. All of them stay, so you can compare them. Use it when the options are real alternatives.
If you need to start over
From the Import tab you can delete the whole import. This removes everything that came with it, including templates you'd already matched, and leaves the rest of your design untouched. It's the clean way to restart if you realise you imported the wrong file.
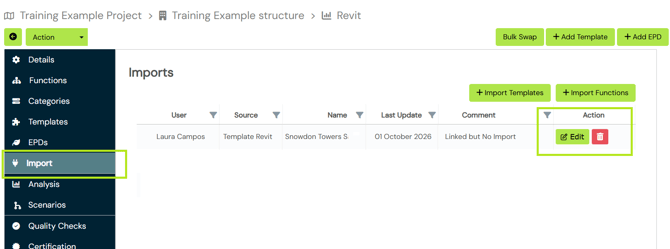
To change individual items rather than start again, click Edit and adjust them there instead.