
In this article:
- Options for importing data into eTool
- Revit Plug-in (automatic)
- Spreadsheet/CSV Bulk Data Import (semi-automatic)
- Manual Input
- CSV bulk import: project level vs. design level
- Project level Data Import
- Design level Data Import using CSV file
- Video: How to Bulk Import using a CSV File
- Related Articles
Options for importing data into eTool
There are three sources you'll typically pull quantity data from — 3D models, drawings, and cost plans
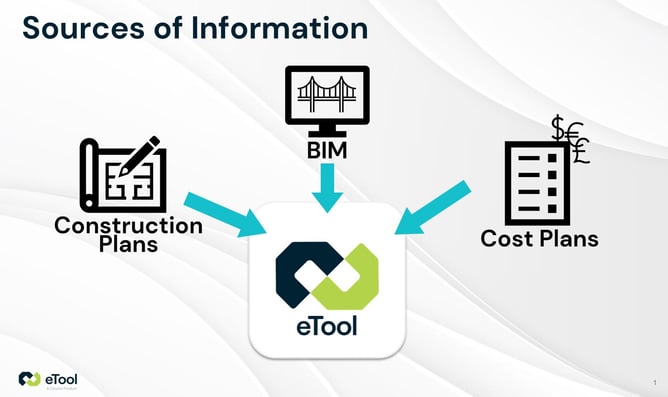
And three methods for getting that data into eTool. You can combine methods depending on the form your data is in.
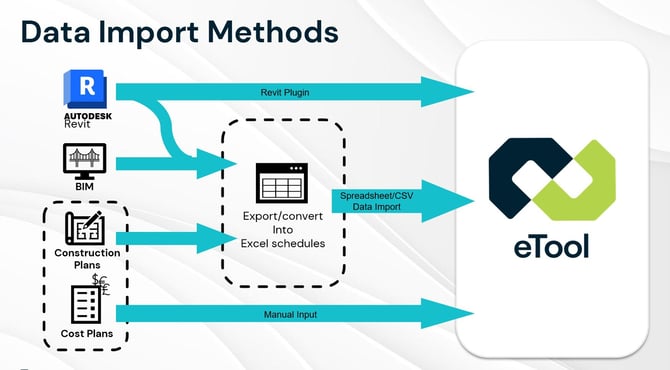
Revit Plug-in (automatic)
The eTool Revit plug-in extracts element quantities directly from your Revit model and links them to your eTool project.
This method captures quantities of elements rather than materials, and the level of detail in your Revit model isn't critical — as long as your family type names are accurate, the plug-in works.
The trade-off: accuracy depends entirely on the quality of your Revit model. You'll still need to check the import results for missing data or double-counting before relying on them.
For setup instructions, see: Revit plugin
Spreadsheet/CSV Bulk Data Import (semi-automatic)
This method imports a spreadsheet or CSV file into eTool. The data in that file can come from BIM software (Revit, ArchiCAD), cost plans, bills of quantities, or drawings — or a combination.
If you're exporting from BIM software, you can generate material schedules using visual programming tools like Dynamo (Revit) or Grasshopper (Rhino), then cross-check the export against drawings and cost plans to make sure nothing's missing.
In our experience, sourcing this data from a cost plan or bill of quantities is the most reliable option. It gives you the chance to scrutinise and aggregate the data before import, which directly improves the accuracy of your LCA.
Manual Input
Enter quantities directly from your cost plan, BIM model, or drawings.
This works well for small updates to a design already in eTool. If you use it across a whole project, you're responsible for keeping organised records of your take-off, calculations, sources, and assumptions — a manual process won't track any of that for you the way a structured import does.
We recommend manual input only for small projects, or for early-stage Target Setting assessments using eTool's whole-building templates.
CSV bulk import: project level vs. design level
Bulk Import Data is a powerful feature that empowers users to upload multiple pieces of information simultaneously.
Bulk import works at two levels:
- Project level — import multiple structures and designs at once. See Project Level Data Import for instructions for instructions
- Design level — import all the templates for a single design at once. Covered in detail below.
Building a CSV file from a cost plan
This walkthrough uses a cost plan as the source, because cost plans align well with eTool's data structure and make aggregation straightforward. If you're working from a BIM model instead, export the schedule first and continue from there.When working with a cost plan, we recommend adding additional columns for eTool input.
Add the columns eTool needs
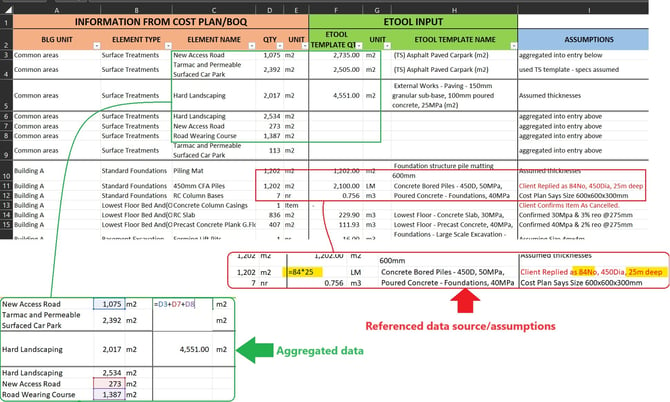
Start with your existing cost plan and add two columns: eTool quantity and eTool template.
eTool quantity
Convert your cost plan quantities into the units eTool's templates use. Where the units don't match, you'll need to calculate the conversion — for example, if your cost plan measures a foundation in m² but the matching eTool template needs volume (m³), you'll need the foundation's dimensions to convert one to the other.
If exact figures aren't available, a reasonable assumption based on similar projects or your own experience is acceptable — but document it in a dedicated assumptions column. This isn't just for your own record-keeping: if the design goes to certification, a documented assumption lets the reviewer see your reasoning immediately instead of querying a bare number.
Exclude items in the cost plan that are irrelevant or minor that wouldn't impact the LCA applying the cut-off criteria is also recommended.

eTool template
There are two ways to find and confirm the right eTool template for each line item.
Option A — search from within the design
- In eTool, click Add template in the design.
- Search using a general keyword — "concrete," for example. If a specific term returns nothing, try a broader one; templates are named for global applicability, not local terminology.
- Check the template description to confirm it's the right fit.
- Copy the template title into your spreadsheet.
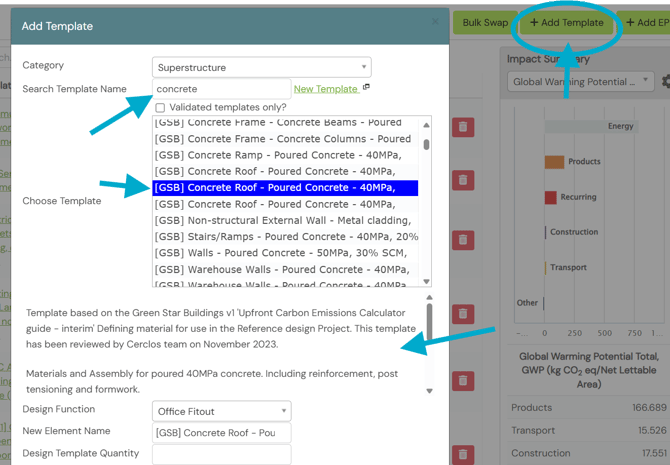
To review a template's data sources and assumptions in more depth before committing to it, add it to the design and click Edit. Most references are based on Australian data, but construction methods for common materials don't vary enough between countries to make this a practical problem for most projects.
Option B — search the eTool Library
- Go to the eTool Library and search using a keyword.
- Check the LCI Group column, and only consider templates in the same LCI Group as your project.
- Open a candidate template in a new tab to examine its description, sources, and assumptions in full.
- Decide whether it's a good match for your line item.
- Copy the template's name into your spreadsheet.
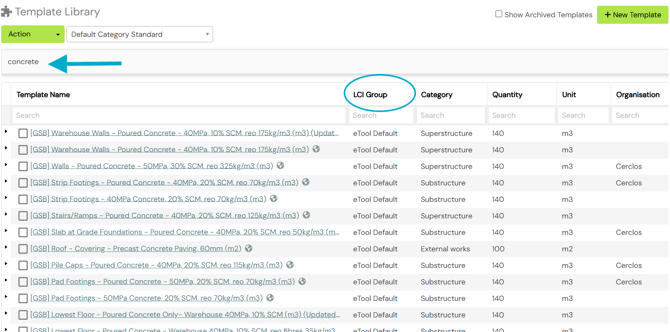
Most projects use eTool default LCI Group, but templates from BRE IMPACT and BRANZ are also available in the Library. eTool doesn't allow mixing LCI Groups within a design, so a template from a different group than your project's won't be accepted if you try to add it — check the LCI Group column before you spend time examining a template's details.
Aggregating line items
Decide whether to combine repeated line items or keep them listed separately — that's a reporting preference. One rule doesn't bend, though: if the same material appears in different categories — concrete used in both Substructure and Superstructure, for instance — keep those entries separate. Combining them would misallocate the impact between categories.
Clean up and export
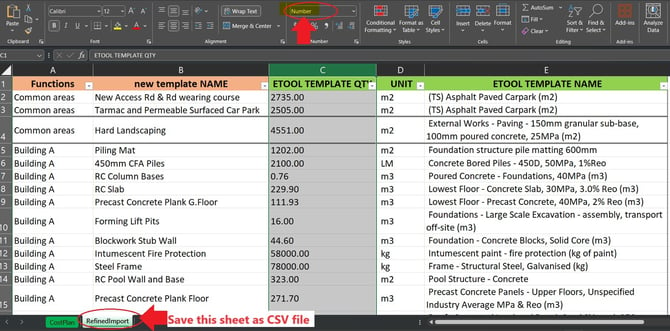
Copy your working data to a new sheet, remove anything not needed for the import, and export it as a CSV.
Before importing, confirm two things:
- There are no blank cells in the data you're importing.
- The quantity column is formatted as numbers, not text.
eTool's import will fail or behave unpredictably if either of these isn't correct — check both before you upload.
Importing the CSV file into eTool
Before importing templates, set up your project's functions. You can add these manually, or — if you have a large number, 50 for example — bulk import them the same way you're importing templates.
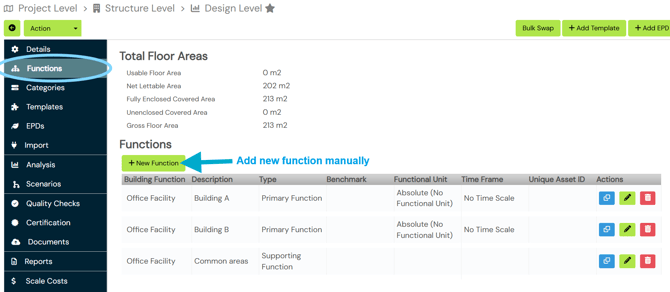
For more details on import functions, see: Functions: bulk import and reporting.
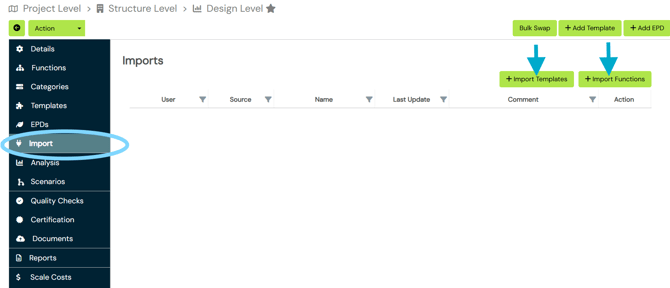
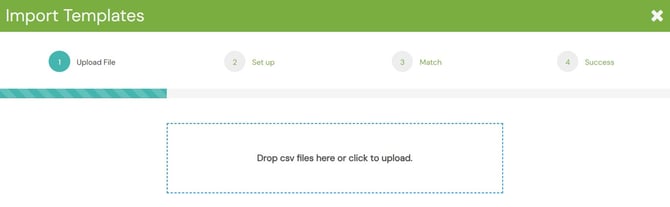
Step 1: Upload the file
Step 2: Set up
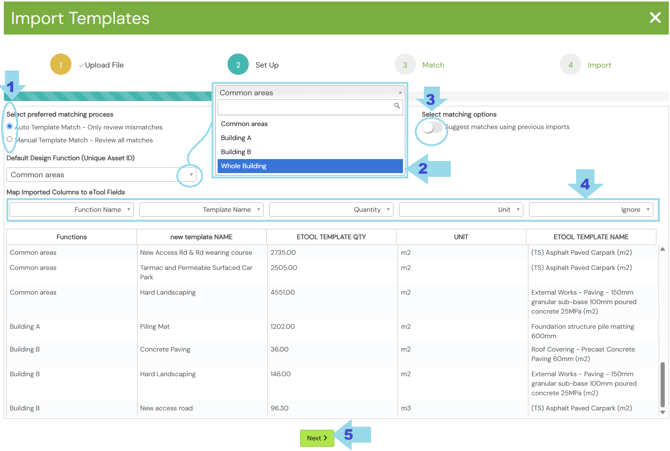
- Choose how templates are matched: automatically, or manually item by item.
- Assign functions in the Function tab. If you select Whole Building, eTool matches templates to functions based on your import file.
- Enabling the Select Matching button allows the software to suggest templates based on your previous imports.
- Match each column in your file to the corresponding eTool field:
- Template Name column — whatever you enter here is added as a prefix to the template's original name once it's in eTool. This matters when you're using the same template in more than one place — for example, the same concrete mix for footings and retaining walls. Giving each a distinct name here lets you tell them apart in eTool afterward. For the last column, 'Ignore' the eTool Template name in this case but it would be handy to have the spreadsheet ready so you can check which eTool template to match.
- Click Next.
Step 3: Match
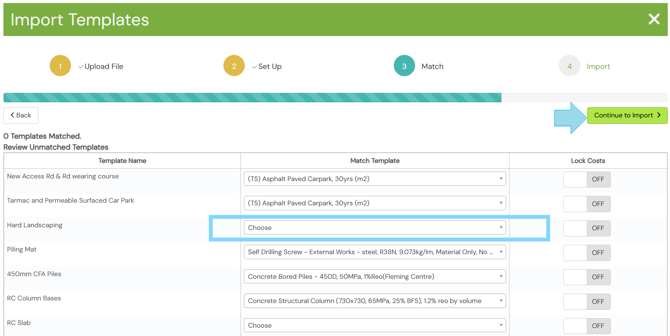
eTool remembers templates you've matched to specific items in past imports and applies them automatically.
For anything left unmatched, check your spreadsheet, copy the eTool template name, and select it manually. Click Next.
Step 4: Finish
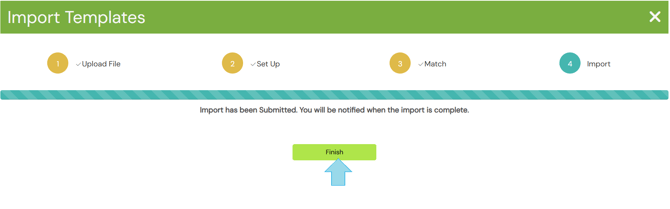
Click Finish. Your LCA model is complete.
Video: How to Bulk Import using a CSV File
https://youtu.be/A4GrL4bxEy0
Related articles: